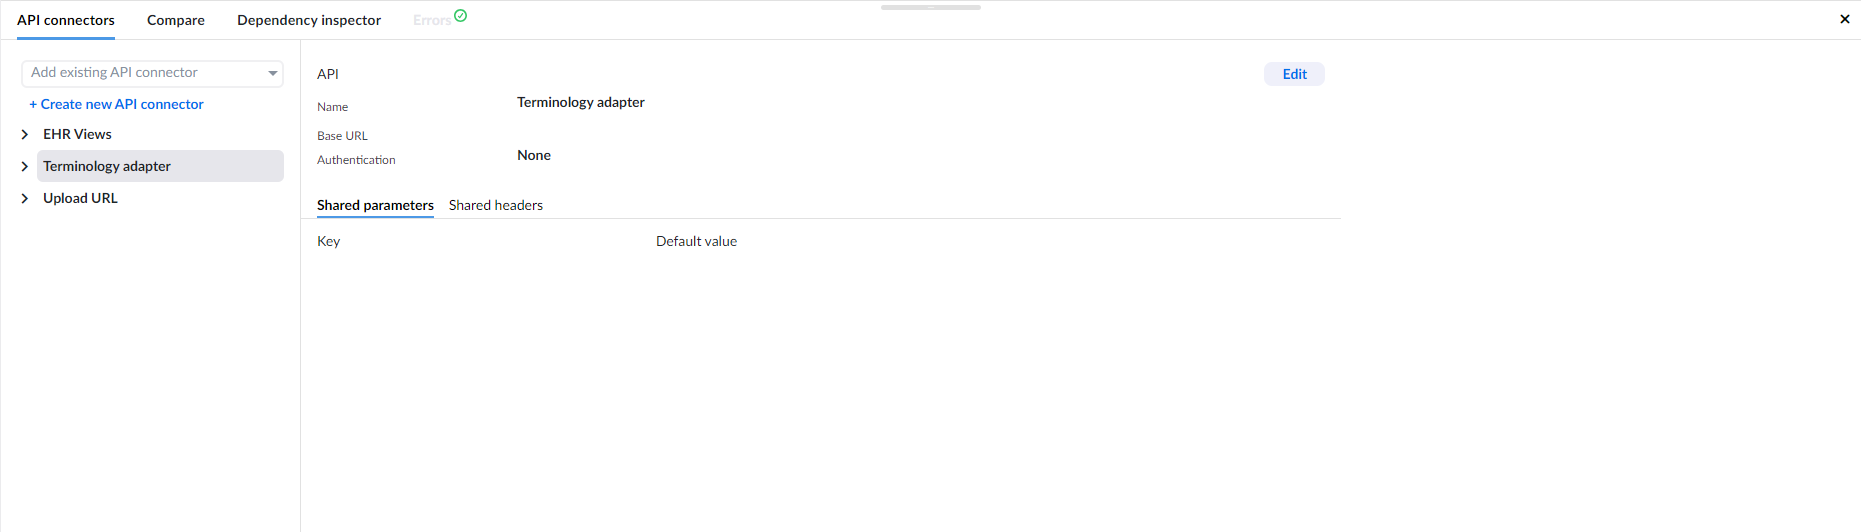
Creating and editing API connectors
You can create and edit API connectors from within Form Builder, or from the project Administration. Both methods are valid and will result in the same API connector being created. The only difference is that if you create an API connector from within the form, it will also be added to the form that you are currently working on.
To create a new API connector, click the Create new API connector link. A new screen will be opened where you can add a new API connector.
For detailed instructions on how to create API connectors, please refer to the API connectors page.
Using API connectors in forms
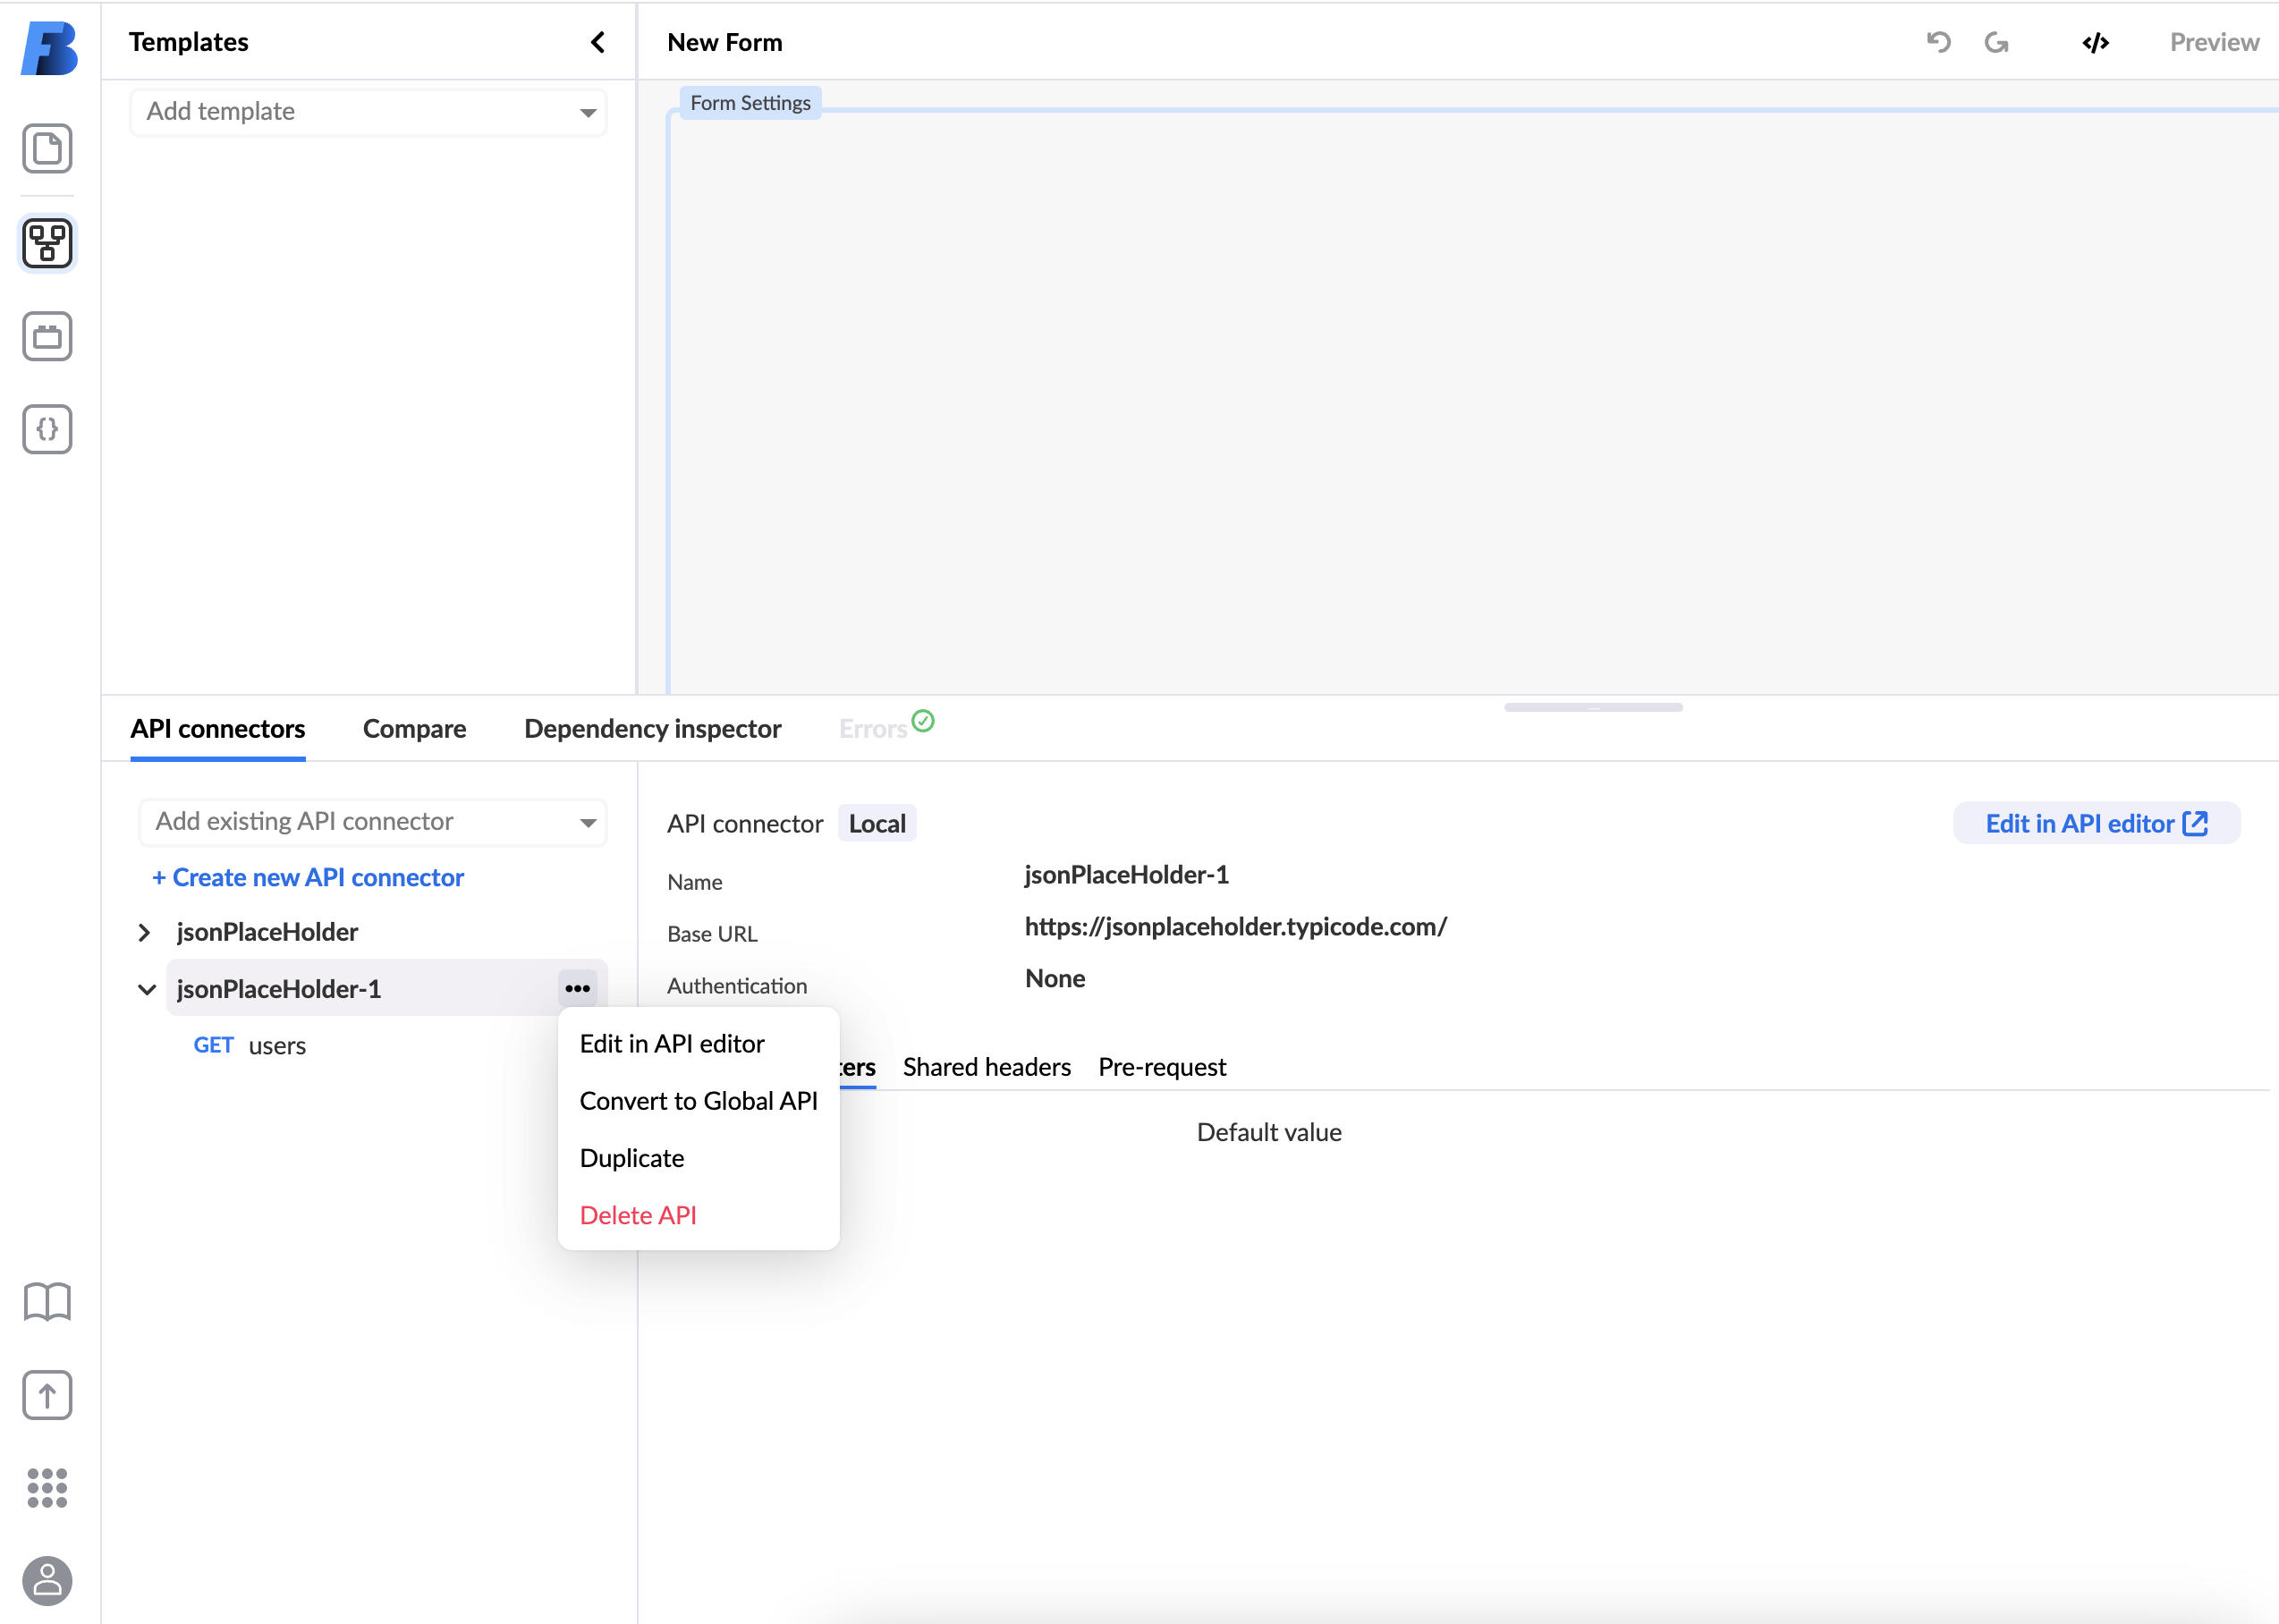
API connectors can be added from the Bottom panel. Adding an API connector to a form makes it available for use in the form. If you have already created API connectors in your project, they will be available in the dropdown Add existing API connector.
To bind API data to a component's data, follow these steps:
- Add the API to the form using
Add existing API connectoror create a new API withCreate new API connector - In the Right panel, add an API data source, select the API call that returns the data you want to bind.
- In the source, select the list of data.
- Bind data: select which data element you want to show as a label and what data you want to save. For example, you want to show the patient's name, but you want to store the patient's unique ID.
Mock response
When using the mock response in an API call, you replace the data that the API call would return with your own mock data. These mock responses simulate, or 'mock', the behaviour of real responses and have similar characteristics to the authentic responses.
This allows you to quickly create prototypes or demos of complex forms that would otherwise rely on external API response data, which can sometimes be unpredictable and perhaps out of your control.
However useful, once you have created forms for actual production, you will most likely want to replace them with real data.
In the video below, we show you how to create and use a mock response.
Response for initialization
Response for initialization is used to tell the Studio what to expect when the call is made, and allows you to bind values to fields without depending on a test call response.
This can either be an object with real data that has all of your parameters, or you can make it up, so you have a template on which to bind all of your necessary fields, but in run-time this will be replaced with actual data from the API call. Common use case is when you need to bind values when you are configuring the multimedia field.
When creating or configuring a POST API call, most of the time you can't post anything to the resource server since you can't provide all the necessary data for posting.
 However, when configuring a multimedia field,
you still need to know which fields the POST call accepts and what response it returns so you can properly bind it to the field.
However, when configuring a multimedia field,
you still need to know which fields the POST call accepts and what response it returns so you can properly bind it to the field.
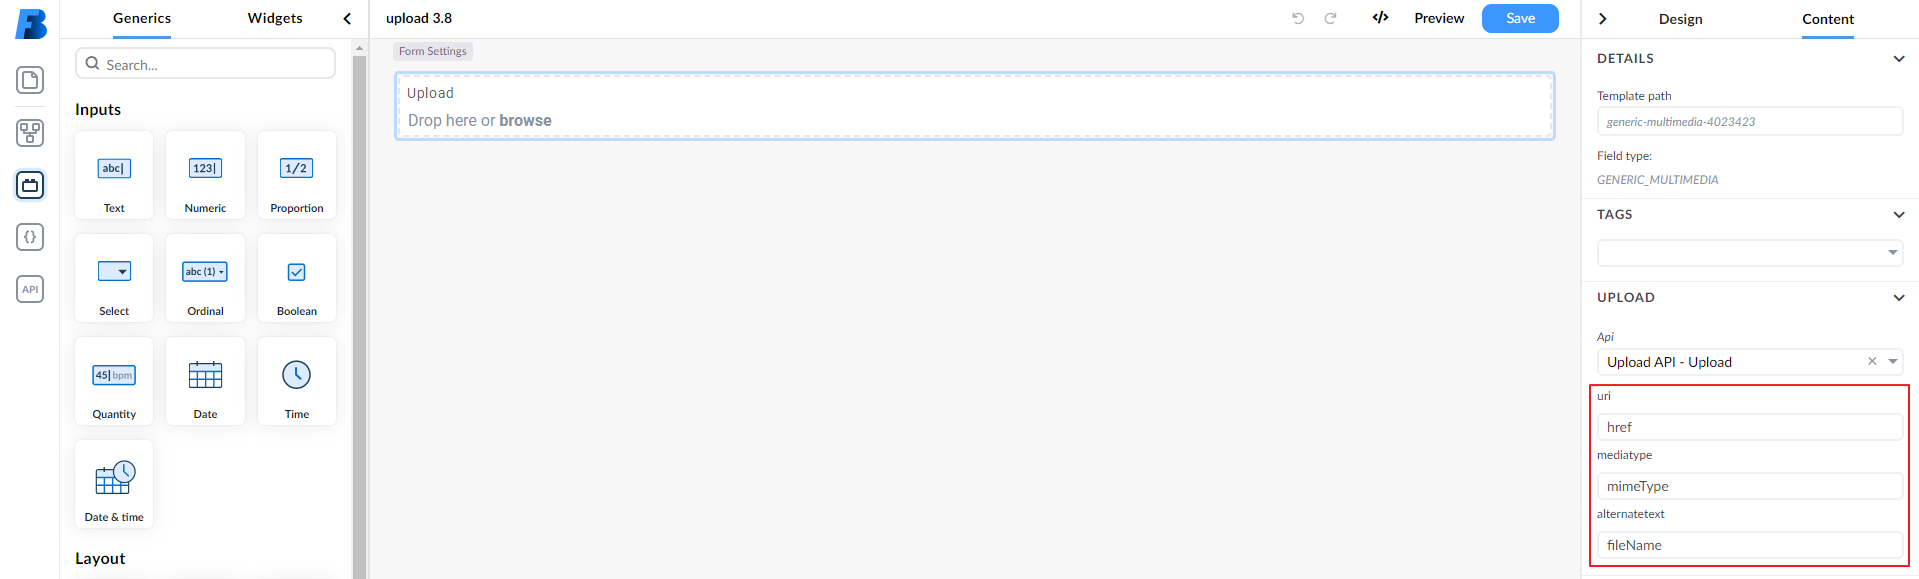
You can learn more about setting the upload field in the Upload section.
Another example is when you know that every call will not have all the values, but you still need an example with all key-value pairs, so you can bind them to the fields.
For further examples about using APIs in forms, see API examples.
Pre-request and Post-response scripts
Pre-request and Post-response scripts are used to set up the environment for the API call, or to process the response after the API call is executed.
When you are working with APIs, you may need to set some data before the API call is made. For example, you need to retrieve the authentication token from the server and set it as a header for all the API calls. This is where setting pre-request data on the API connector comes in handy, since it is executed before each API call.
Pre-requests can be defined on the API connector or on API calls. When a pre-request is defined on the API connector, it will be executed before each API call. When a pre-request is defined on an API call, it will be executed before that specific API call. If a pre-request is defined on both the API connector and the API call, the API call pre-request will be executed after the API connector pre-request.
You may also need to manipulate the response before it is displayed on the form, or used in other calls. Some use-cases of where manipulating the response can be useful:
- combine data from multiple properties into one. For instance, you can combine
firstNameandlastNameinto one field calledname - simplify paths by mapping complex nested data structures to a flat structure
- create a clear data model tailored to your specific need by filtering response items and mapping them to a new data model
Structure of a pre-request script
In a pre-request script, you can use the api object to call other APIs, set variables, and more.
The processor object is used to control the flow of the pre-request script. Each pre-request script must call processor.done() or processor.error() to continue with the next pre-request or original request.
processor.done() or processor.error() to continue with the next pre-request or original request.In this sample code, the api object is used to call an API asynchronously, and the result is stored in a variable. Then the processor.done() function is called to continue with the next pre-request or original request.
In case of an error, the processor.error() function is called.
api.callApi('myApi', 'myApiCall', false)
    .then((result) => {
        api.setVariableValue('myVariable', result);
        processor.done();
    })
    .catch((e) =>
      processor.error(e)
    );
See an example of how to use pre-request to retrieve authentication tokens.
Structure of a post-response script
In a post-response script, you can manipulate the response received from api call before passing it to the caller of the api call. You can also use the api object to call other APIs, set variables, and more.
The processor is used to retrieve the result received from the api call through processor.responseData.
The processor object is also used to control the flow of the post-response script. Each post-response script must call processor.done(result) to pass the result back to the caller, or use processor.error() to signal that an error occurred.
/* store the original result in a variable for easier access */
let originalResult = processor.responseData;

/* create a new object where you manipulate the original result */
let result = {
  property1: processor.responseData.firstProperty,
  property2: processor.responseData.secondProperty
};

/* when you are done with the post-request, call processor.done(result) to finish the request */
processor.done(result);
See an example of how to use post-response to manipulate the response.
Local APIs
Local APIs are APIs that are embedded in the form itself. This is useful in some cases when you want to create a form that is self-contained and does not rely on global APIs.
Local APIs are present in forms created in earlier versions of "Studio" before the introduction of global APIs. In newer versions of Studio, you can edit those local APIs when you open a form that was created in earlier versions, or you can create new local APIs by duplicating an existing global API as a local API.
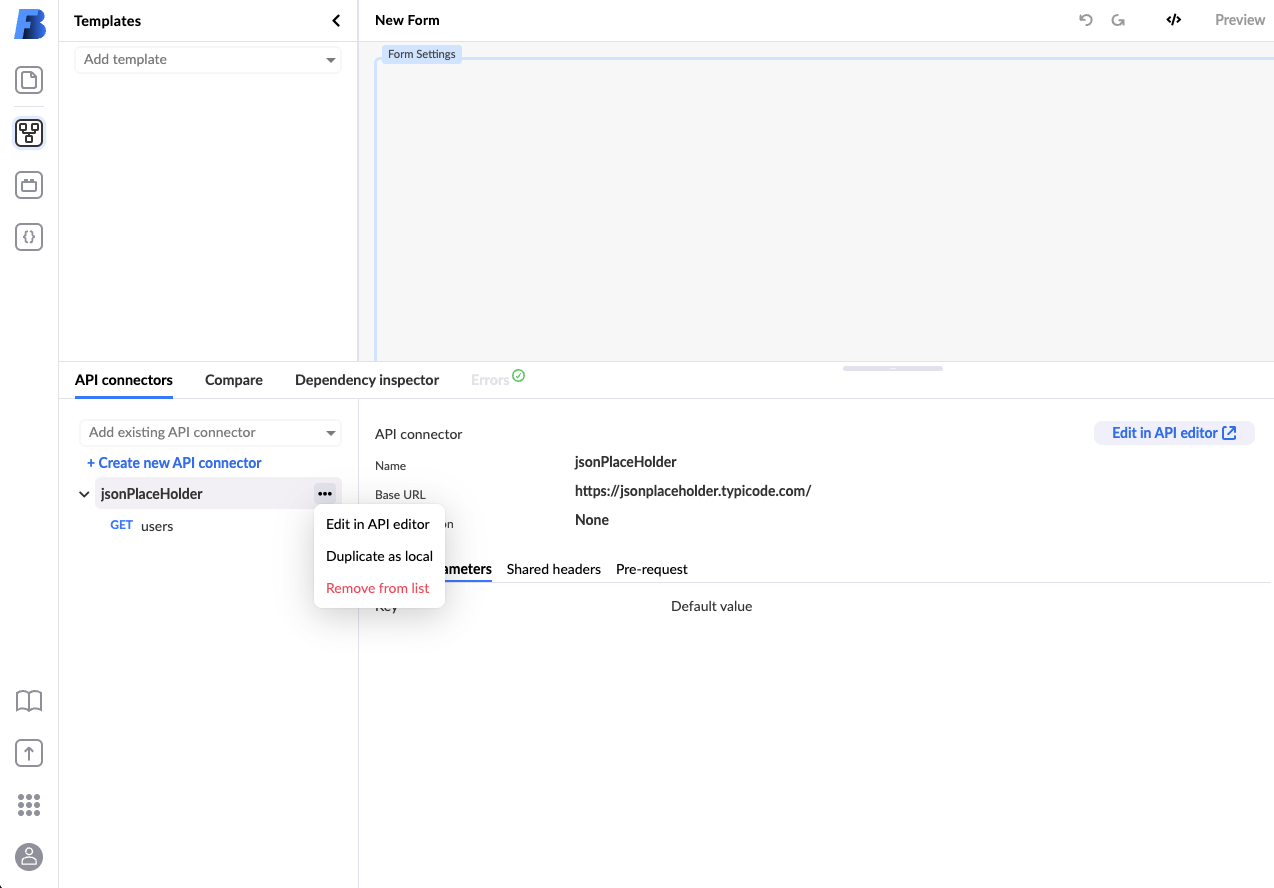
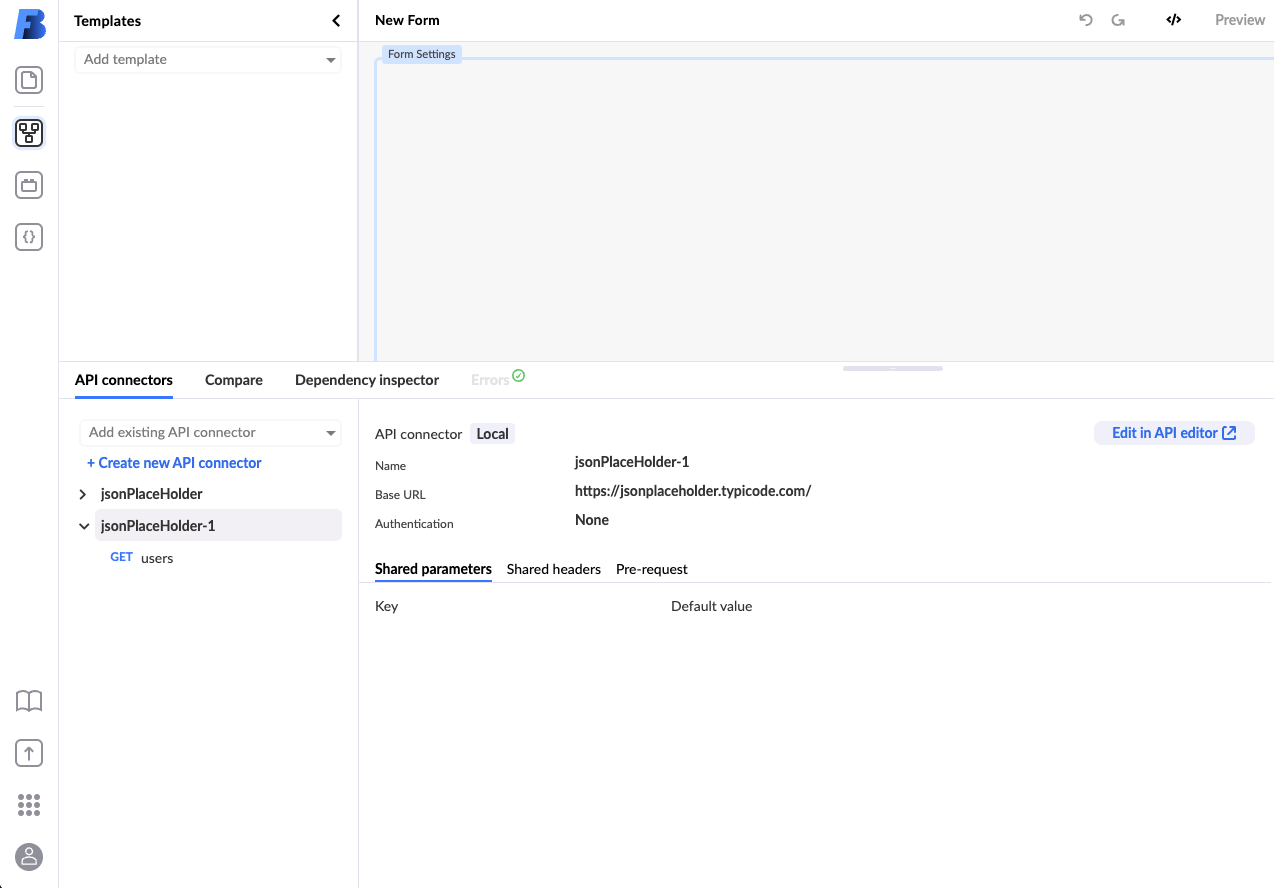
Duplicating global APIs as local APIs
To convert an API connector to a local API, open the additional options menu of your target API and click the Duplicate as local button.
This action will create a local copy of the API connector, which will be marked with the tag 'Local' in the header.
The global API connector will remain unchanged. You can remove it manually from the form if you no longer need it.
Converting local APIs to global APIs
You can convert your local APIs to global APIs by opening the additional options menu of your target API and clicking the Convert to Global API button.
There are a few things to keep in mind when converting local APIs to global APIs:
- all local variables will be converted to external variables. The import dialog will list the variables that will be converted to external.
- all references to form elements used in the API will be removed. to overcome this, create an external variable and map the form element value to it, then use the external variable in the API.