External APIs and variables examples
The following examples will show you how to:
- call API with dynamic parameters,
- create a POST API call that sends data from a form to an API endpoint.
Both examples will demonstrate the use of variables, interactions, and working with the external APIs.
Example: Calling API with dynamic parameters
Often you want to call an API endpoint with data that we got from the previous API call, or you may want to use data that you get from the user's input.
The following example will provide an example that will:
- use the sample jsonplaceholder API,
- read users from the user endpoint, and
- read the user's blog post from another API at the user's request.
The second API call will need to send the clicked user id. In this case, the user id is the dynamic data read from the user's endpoint.
In the Lists section, you have created a GET request to read a user's list. Let's display users in a grid and add a Read post button to each user.
Preview of the users grid:
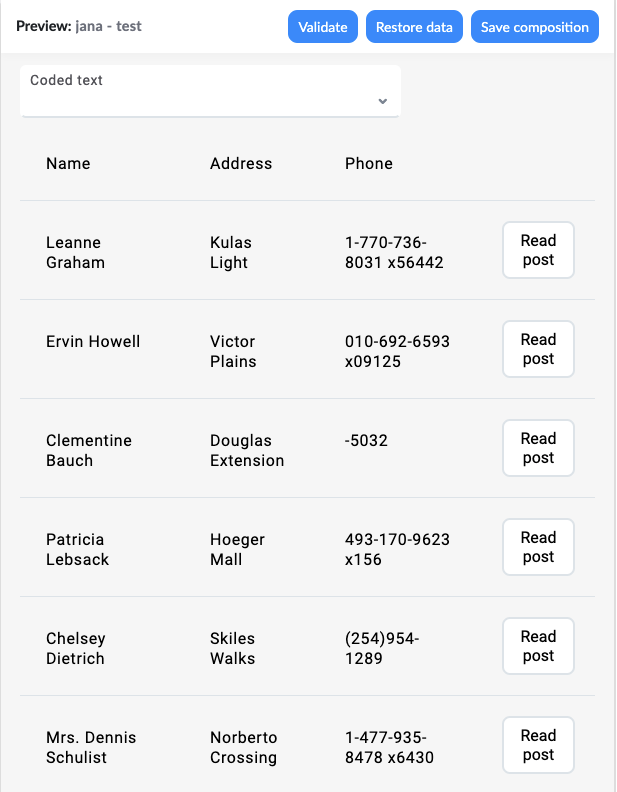
Let's read the latest post from the selected user on the Read post button.
To read the latest post, you will need two variables:
- to store information about the selected user, and
- a variable that will save the response from the
Read postendpoint.
Steps to implement:
- create variables userId and postResponse,
- create an API call with a parameter,
- set the numeric field to store the user id,
- on button-click set userId and call API endpoint,
- fill the input field with post data.
Create Variables
Let's create the userId and the postResponse variables.
Both variables have an internally defined source. Meaning we will populate them with user input and the API response data. UserId is a number, and a postResponse is a string since it will have a post text.
Create an API call with a parameter
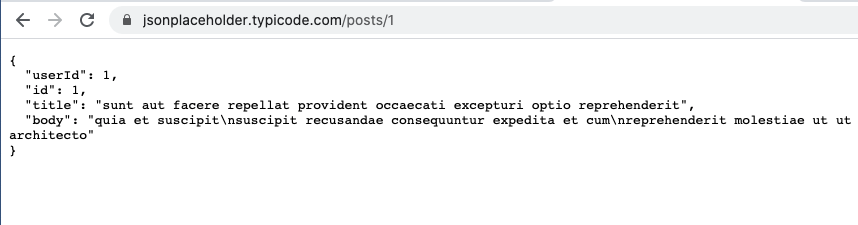
The endpoint in the example is the example placeholder API.
To add an API GET call with a parameter:
- create a new endpoint,
- add a link to the endpoint
- add a parameter or a path parameter {nameOfParameter}
- once you have set the test value of a parameter, you can initialize the API call.
- on the form, insert the value of the parameter into the API call in our case we will use a variable
Set numeric field to store user id
The next step is to set the userId variable. To set the userId variable, we need to read the user id value from the user's API response.
The user data is already displayed in the grid, and you can add a numeric field that you associate with the user ID from the API response.
On button click call an API endpoint and set variables
The next step is to call the API. To call an API, you need a value of the userId variable. Once the API sends a response, you can populate the variable postResponse.
You will add this interaction in the Read post button interactions settings. The button will have the following interaction; when the button is clicked, the form will save the numeric field data (user's ID) into a userId variable. Then the form will call an API, read the post, and set the postResponse variable's value to the body parameter from the API response.
Fill the input filed
Once the post data is stored in the postResponse variable, you can display it on the form. To do so, you will:
- add an input component on the form,
- set the input interaction. The input interaction will detect postResponse variable change and populate that change into an input value. This way, you will show the latest blog post in the input field.
Example: sending a POST request
A post request sends data to a server to be stored. This example demonstrates how to save a blog post. A typical blog post would expect JSON data with userId, title, and body. Example uses the sample jsonplaceholder API,
{
  "userId": "1",
  "title": "Super interesting title",
  "body": "Body about something super interesting"
}
To create a POST request, you will need to send data to an API. You want to read this data from a form. To read data from a form, you will need variables to populate on the Save button click. When all the variables are populated, you will be able to send a request. After the request returns a response, you can display a response on the form.
The steps to create a POST request to external API are:
- create a form,
- create variables to store from data,
- create POST endpoint request with dynamic variables,
- populate variables, and send an API POST request, and
- display a result
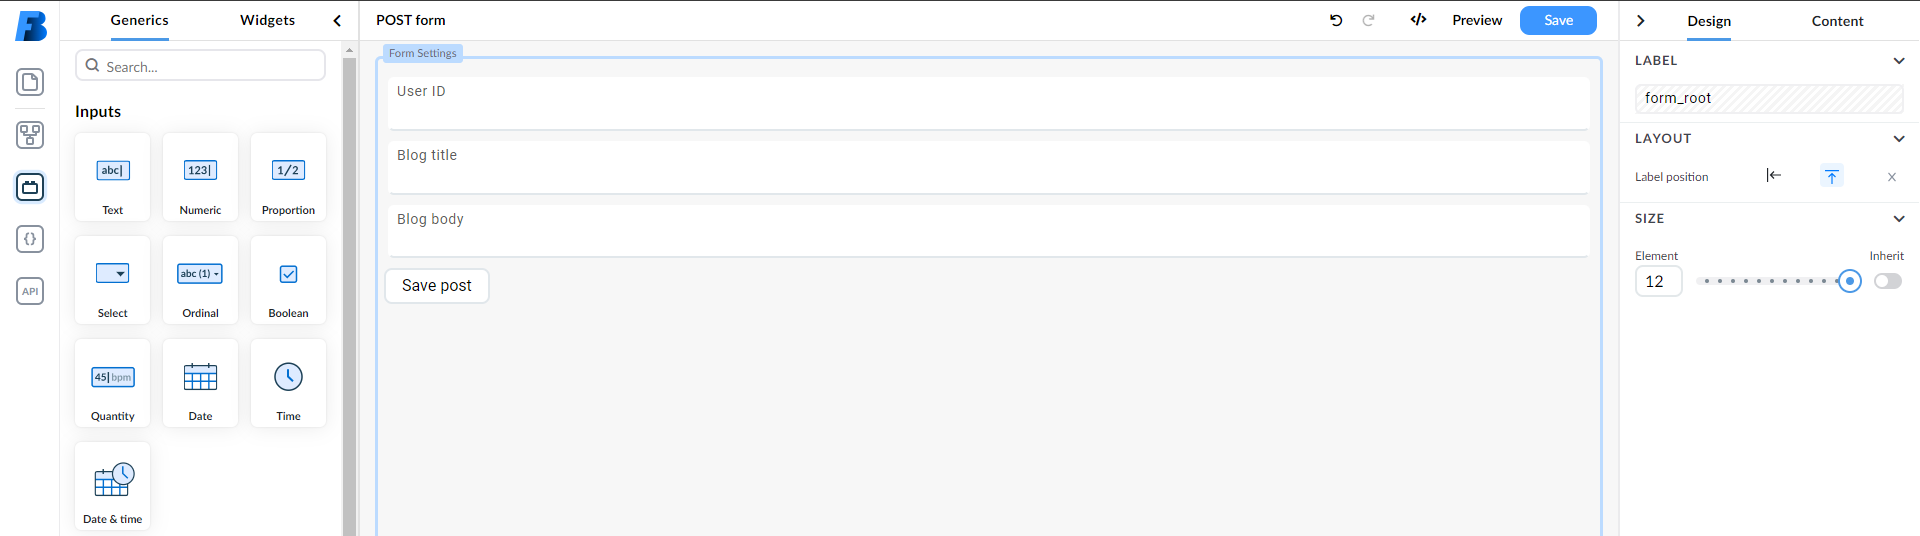
Create form
Let's create a form in the form builder. The form will include:
- user ID (numeric field),
- blog title (input field),
- blog body (input field), and
- a save button.
Create variables
You will read the user id, post title and post body from the form, and you need to create variables to store the data from the form.
When you get a response from an API, you will want to save the blog post's body into a variable. Let's name the variable savedPost.
Create POST endpoint request with dynamic variables
Let's create a POST API call where we will be sending the data from the form to the endpoint. For this we will need:
- the endpoint to which we want to send the data
- a post body with <variable_name> notations for the variables we want to send
- a sample response from the server so we can initialise the API
- Link the variables from our form to the API
Example of the body we want to send:
{
  "userId": "<userId>",
  "title": "<postTitle>",
  "body": "<postBody>"
}
Example of the response from the server:
{
  "userId": "1",
  "title": "test",
  "body": "Test body",
  "id": 101
}
Response for initialization to the POST request, you can initialize the API call.Now we need to add the variables from the form to our API call.
Populate variables and send a API POST request
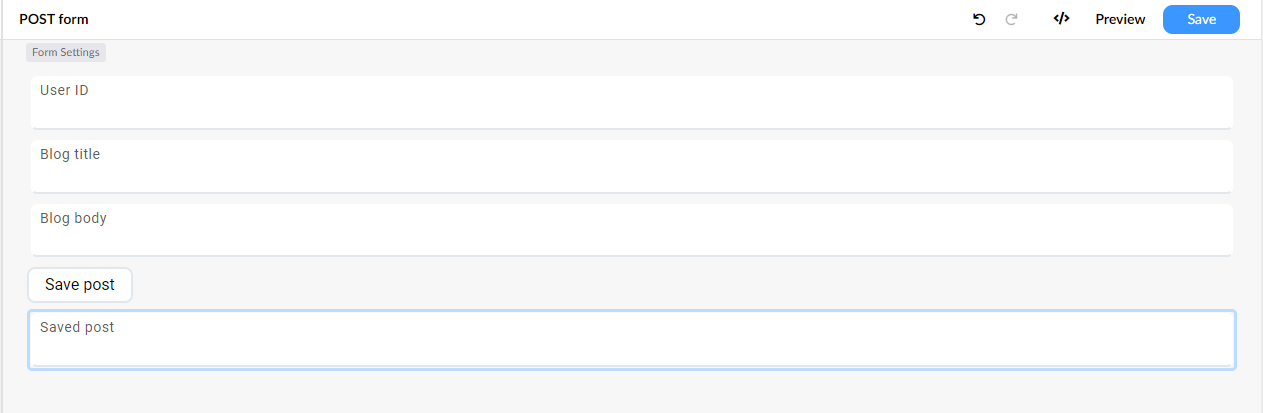
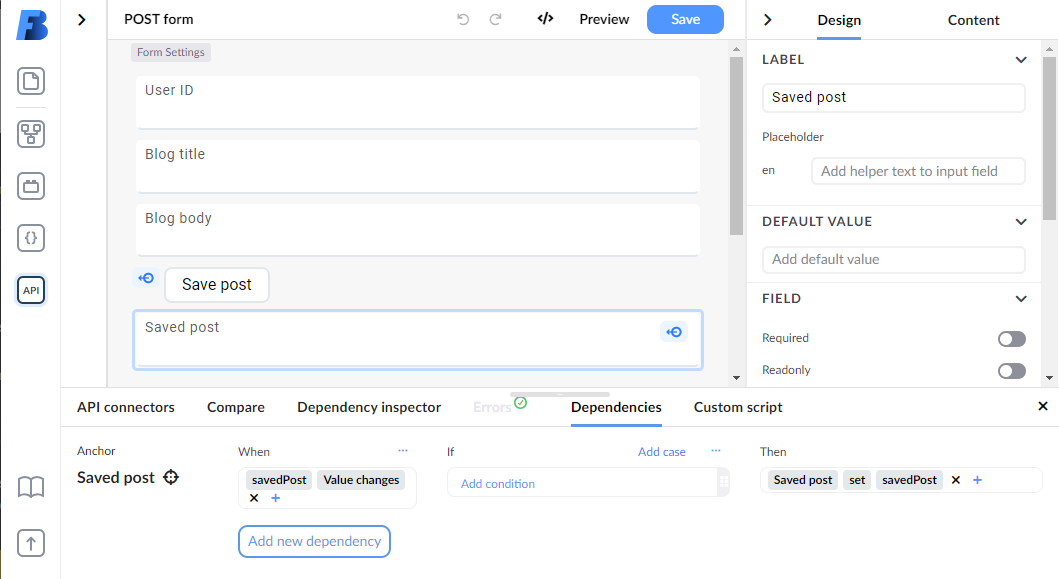
On a successful post save, you will display the result on the form. Let's add an input field and call it Saved post.
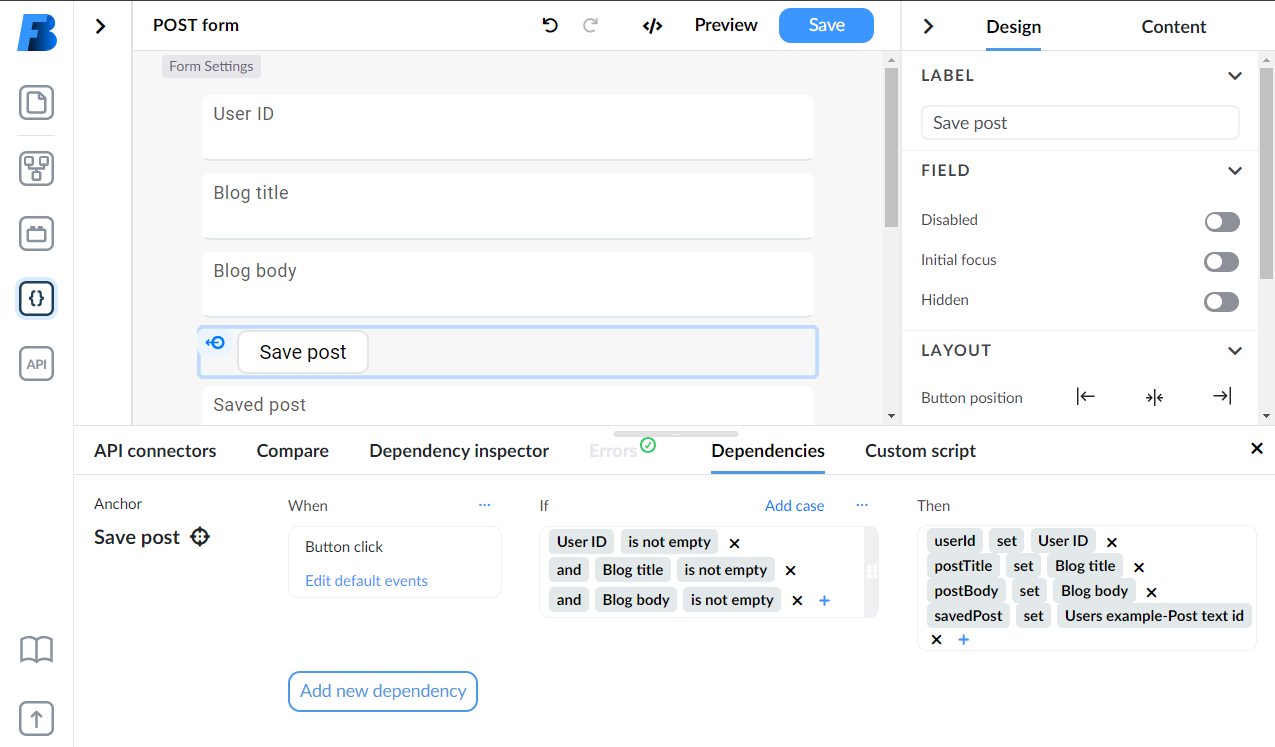
We need to add a dependency on Save post button; on button click, check if User ID, Blog title, and Blog body inputs are not empty. If not, then set the variables userId, postTitle, and postBody. Then call an API with variables, wait for the response, and set the savedPost variable to the body parameter of the response representing a blog post.
The final step is to listen when the savedPost changes and display the change in the Saved post input field.
Let's test the save blog post form:
Example: Using pre-request to retrieve authentication tokens
When you are working with APIs, you may need to set some data before the API call is made. For example, you need to retrieve the authentication token from the server and set it as a header for all the API calls. This is where setting pre-request data on the API connector comes in handy, since it is executed before each API call.
Create an API connector with a call to get the authentication token
Start by creating an API call to get the token. This call will be used to set the authentication token for all the API calls in the connector.

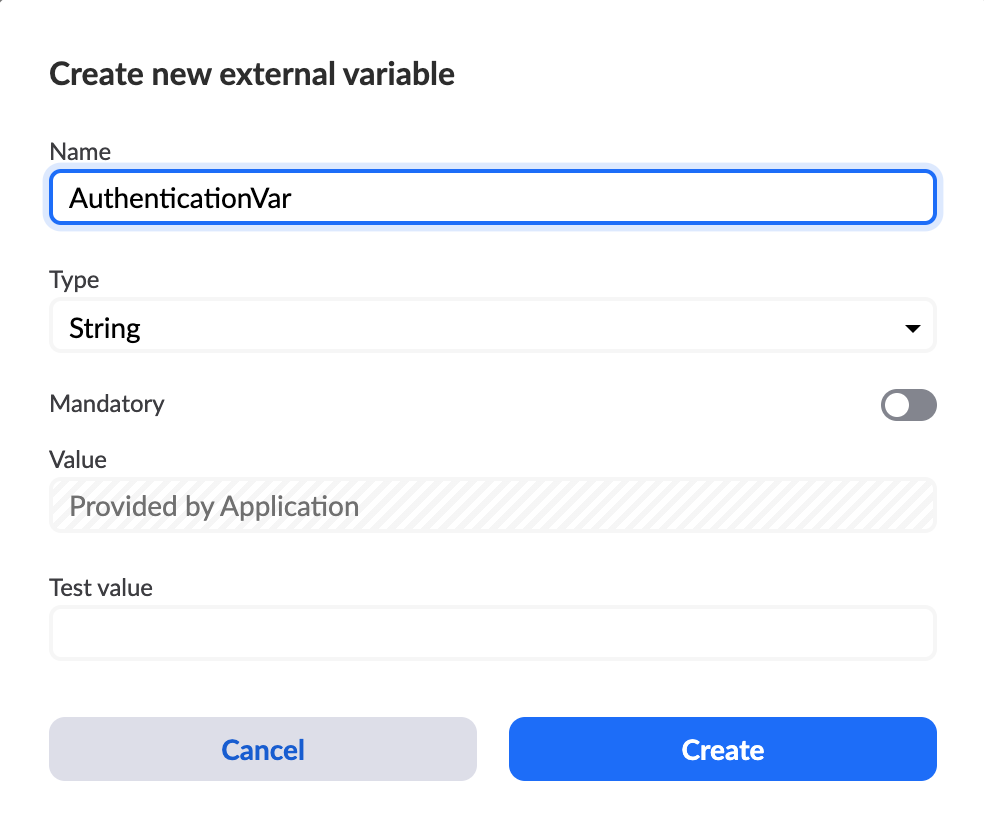
Create a variable that will hold the authentication token
Go to "Administration" and select "External variables" and create a new external variable. Choose a name for it and make sure it is set as a string type.
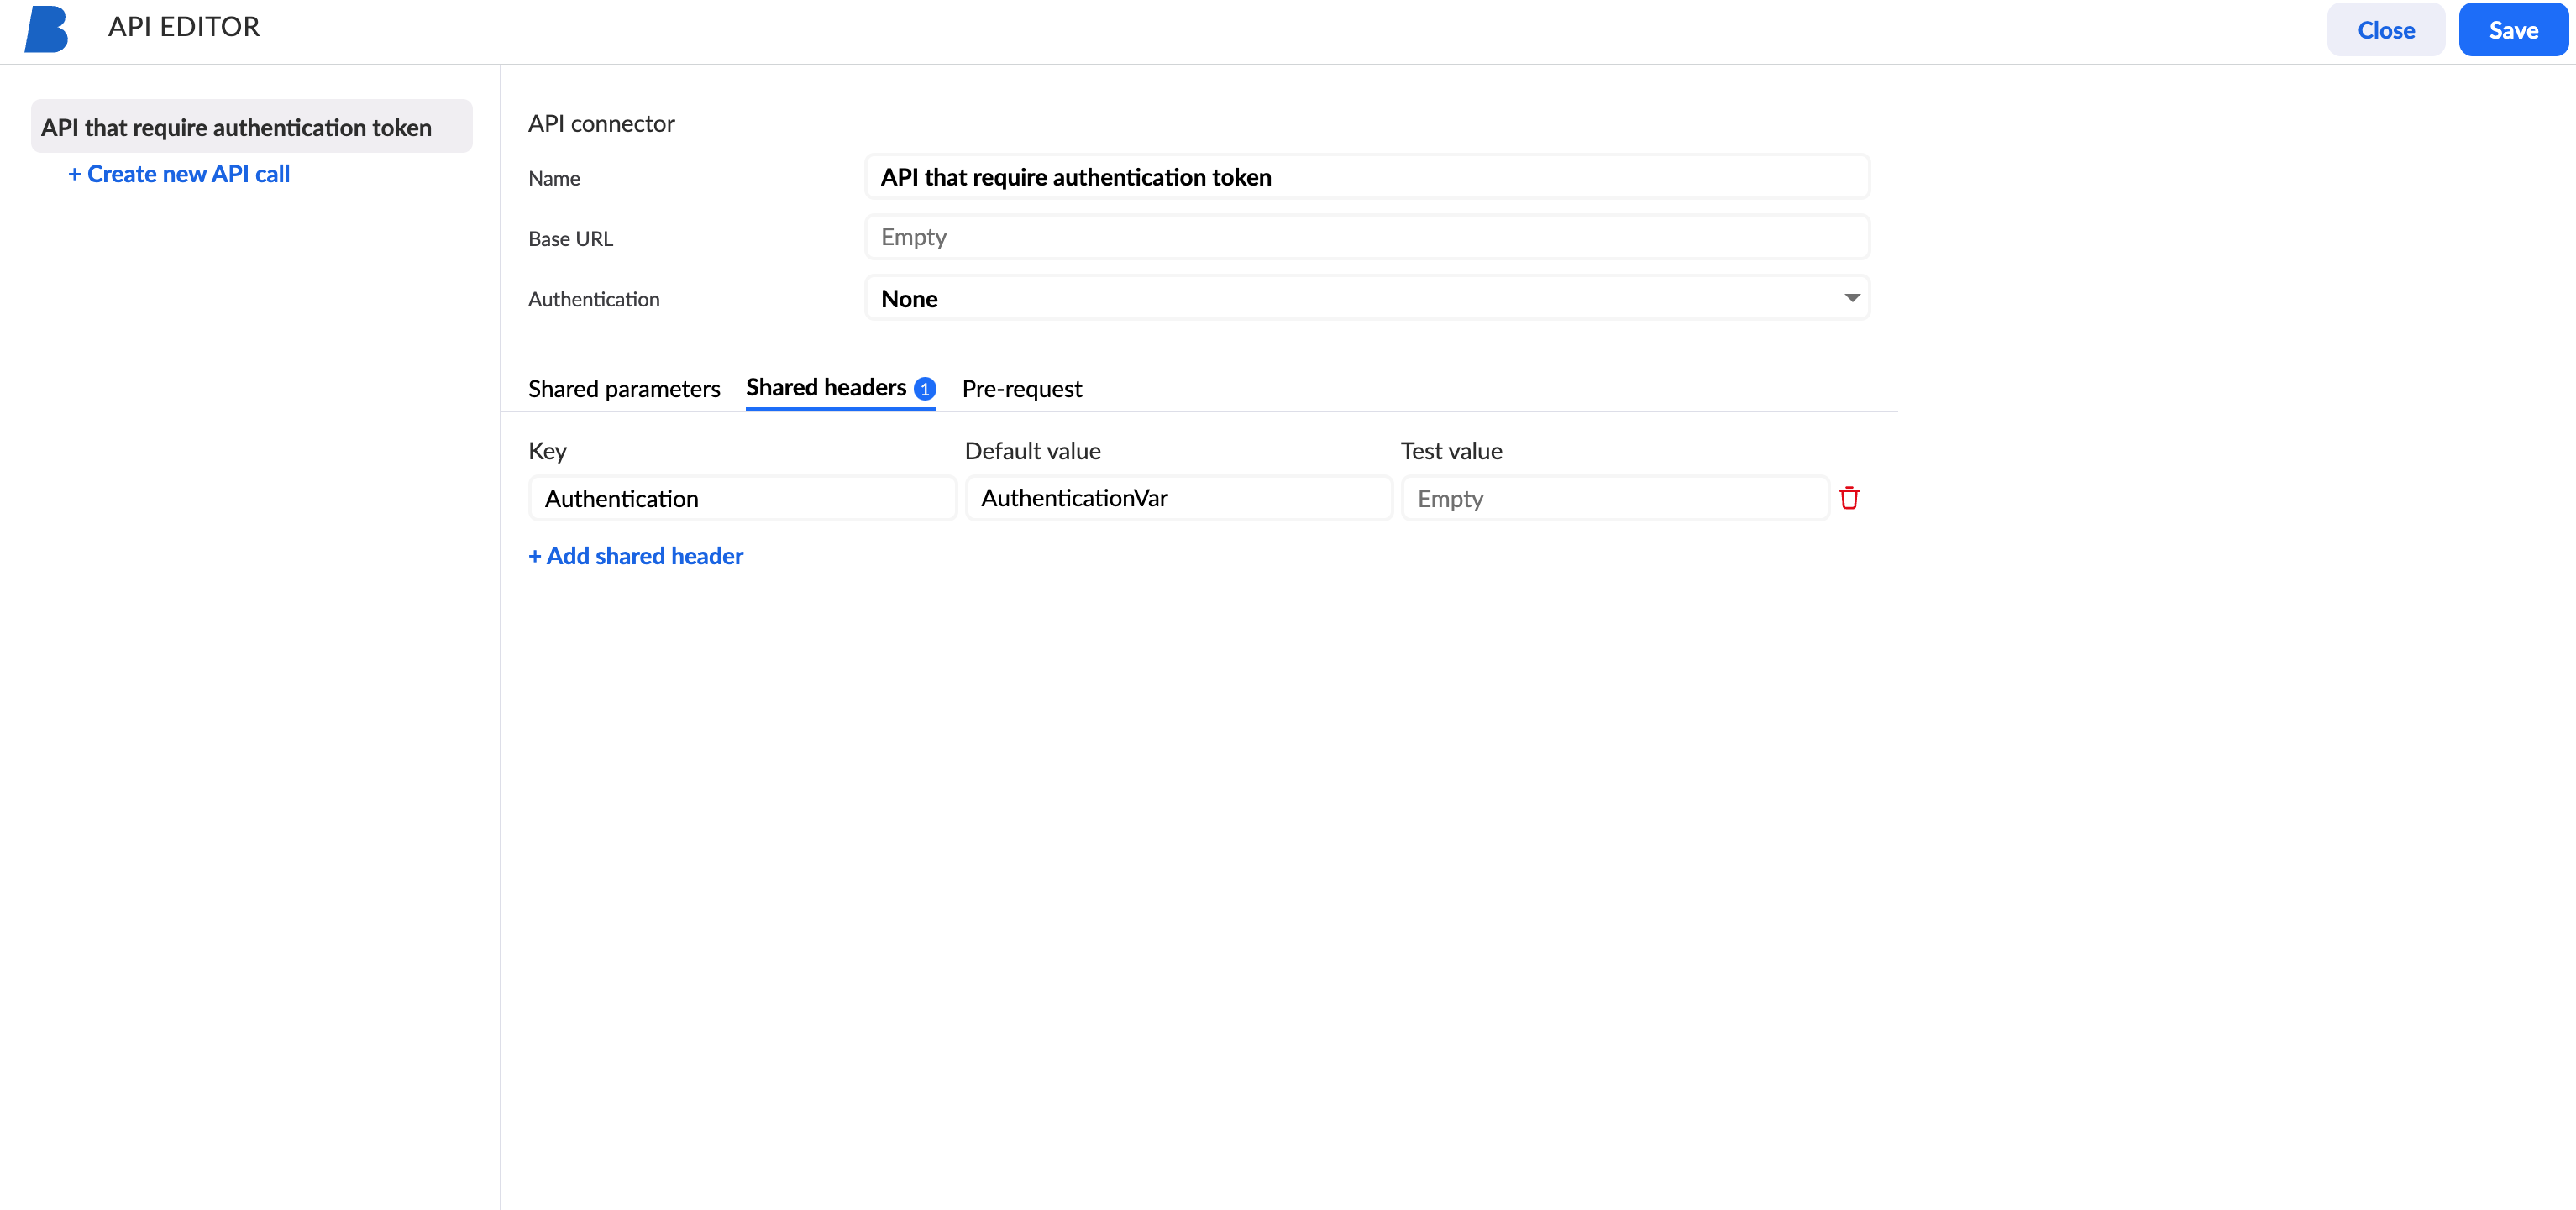
Create an API and set the shared headers to the authentication token variable
Now that we have the call that retrieves the authentication token and the variable that will hold the token, we can create an API call that will use the token.
Set the pre-request script to set the authentication token
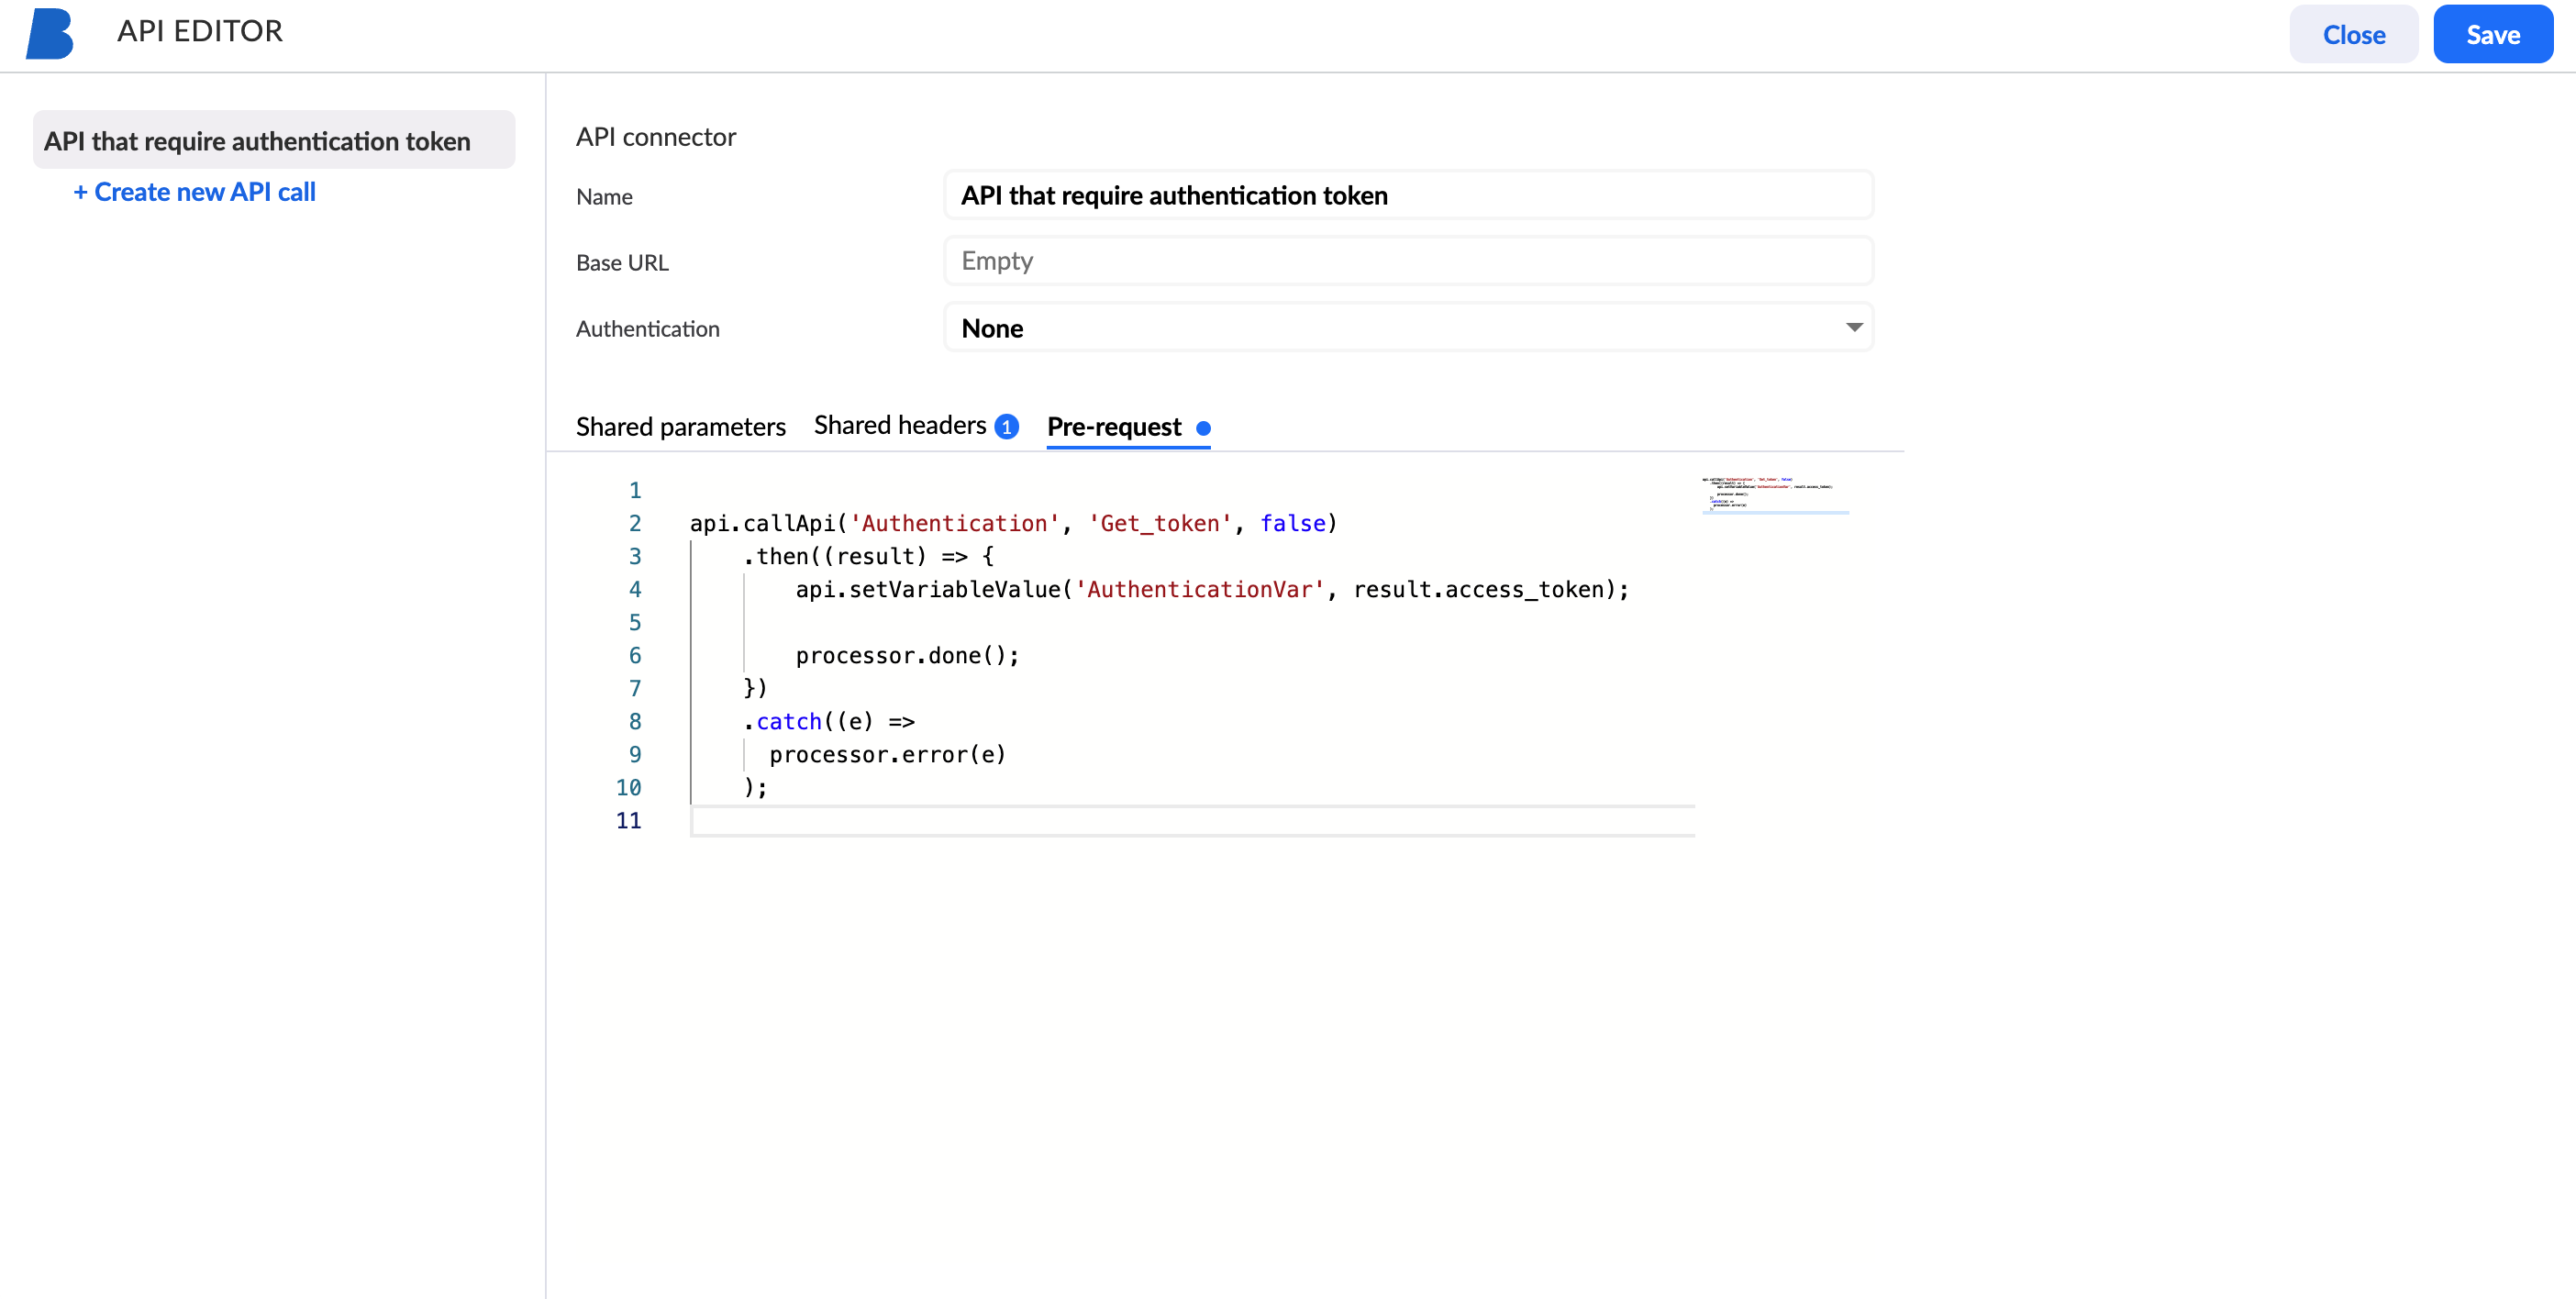
api.callApi('Authentication', 'Get_token', false)
    .then((result) => {
        api.setVariableValue('AuthenticationVar', result.access_token);

        processor.done();
    })
    .catch((e) =>
        processor.error(e)
    );
Now you can add API calls to this API. The pre-request script will be executed before each API call in the connector. The script will call the authentication API to retrieve the token and set it to the variable. The API call will then use the token in the header.
Example: Using post-response to manipulate the response data
When you are working with APIs, you may need to manipulate the response before it is displayed on the form, or used in other calls.
Some use-cases of where manipulating the response can be useful:
- combine data from multiple properties into one. For instance, you can combine
firstNameandlastNameinto one field calledname - simplify paths by mapping complex nested data structures to a flat structure
- create a clear data model tailored to your specific need by filtering response items and mapping them to a new data model
In this example, we will use the post-response script to map the response to a new data model. The below displayed response is a patient resource from the FHIR server. We will map the response to a new data model that will be used in the form.
Sample response retrieved from a FHIR server
{
  "resourceType": "Patient",
  "id": "example",
  "text": {
    "status": "generated",
    "div": "<div xmlns=\"http://www.w3.org/1999/xhtml\">John Doe</div>"
  },
  "identifier": [
    {
      "use": "usual",
      "type": {
        "coding": [
          {
            "system": "http://terminology.hl7.org/CodeSystem/v2-0203",
            "code": "MR",
            "display": "Medical record number"
          }
        ]
      },
      "system": "http://hospital.smarthealth.org",
      "value": "12345"
    }
  ],
  "active": true,
  "name": [
    {
      "use": "official",
      "family": "Doe",
      "given": [
        "John"
      ]
    }
  ],
  "gender": "male",
  "birthDate": "1990-03-14",
  "address": [
    {
      "use": "home",
      "line": [
        "123 Main St"
      ],
      "city": "Somewhere",
      "state": "CA",
      "postalCode": "90210",
      "country": "USA"
    }
  ],
  "contact": [
    {
      "relationship": [
        {
          "coding": [
            {
              "system": "http://terminology.hl7.org/CodeSystem/v2-0131",
              "code": "N",
              "display": "Next of kin"
            }
          ]
        }
      ],
      "name": {
        "family": "Doe",
        "given": [
          "Jane"
        ]
      },
      "telecom": [
        {
          "system": "phone",
          "value": "+1 555-555-2003",
          "use": "mobile"
        }
      ],
      "address": {
        "line": [
          "123 Main St"
        ],
        "city": "Somewhere",
        "state": "CA",
        "postalCode": "90210",
        "country": "USA"
      },
      "gender": "female"
    }
  ]
}
Mapping the response to a new data model in the post-response script

Post-processor code
let originalResponse = processor.responseData;

let result = {
    firstName: originalResponse.name[0].given,
    lastName: originalResponse.name[0].family,
    hasValidContactInformation: originalResponse.contact && originalResponse.contact.length !== 0
}

processor.done(result);
New data model
{
  "firstName": "John",
  "lastName": "Doe",
  "hasValidContactInformation": true
}