Start building with Studio
This content is intended for beginner Studio users.
Form builder is the low-code editor you use to design clinical forms in Better Studio. You build forms by adding fields to a canvas, arranging them into pages and sections, and configuring how each field behaves. No coding is required.
In this step, you will create a simple form with two fields. That is enough to complete the rest of the Start here guided walkthrough.
Make sure you are logged in to Studio and have a project open. If you do not see a project on the list, visit the Studio community on Hive (trial users) or contact your EHR Administrator or ZenDesk support (licensed users) for assistance.
Step 1: Open Form builder
- Log in to Studio and go to Projects.
- Select the project you want to build in.
- On the Project dashboard click on Form builder.
You can also reach Form builder and all the other Studio project tools by clicking on Tools in the left-side project menu.
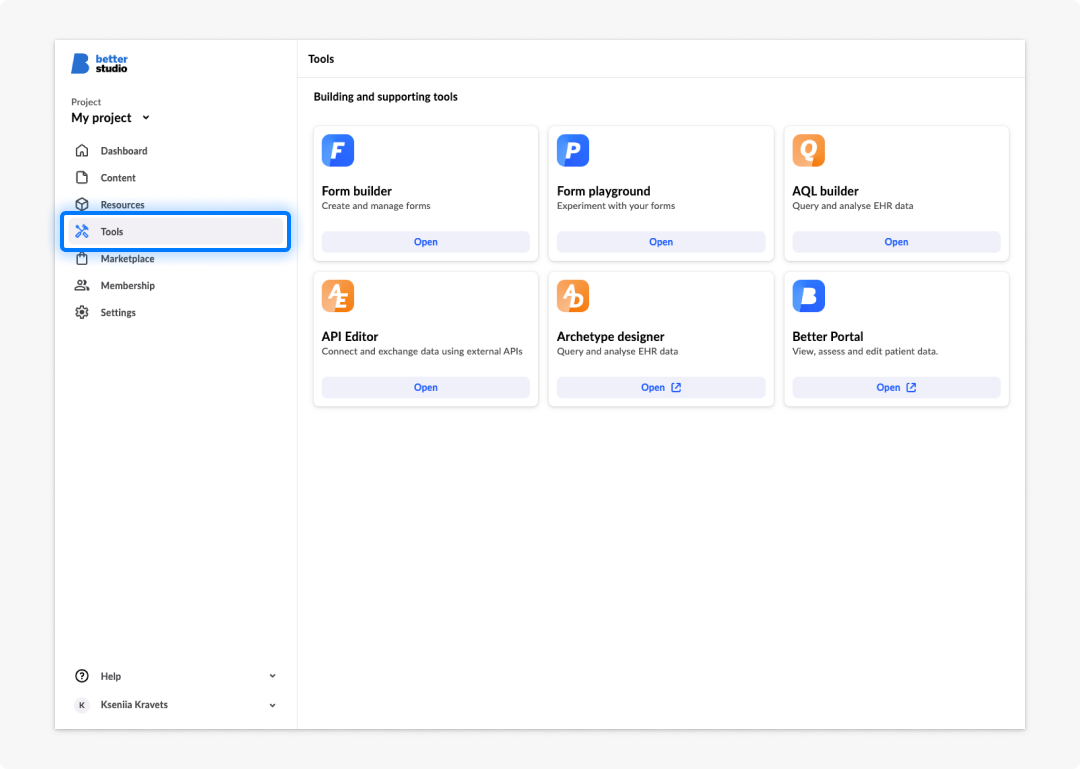
Step 2: Create a form
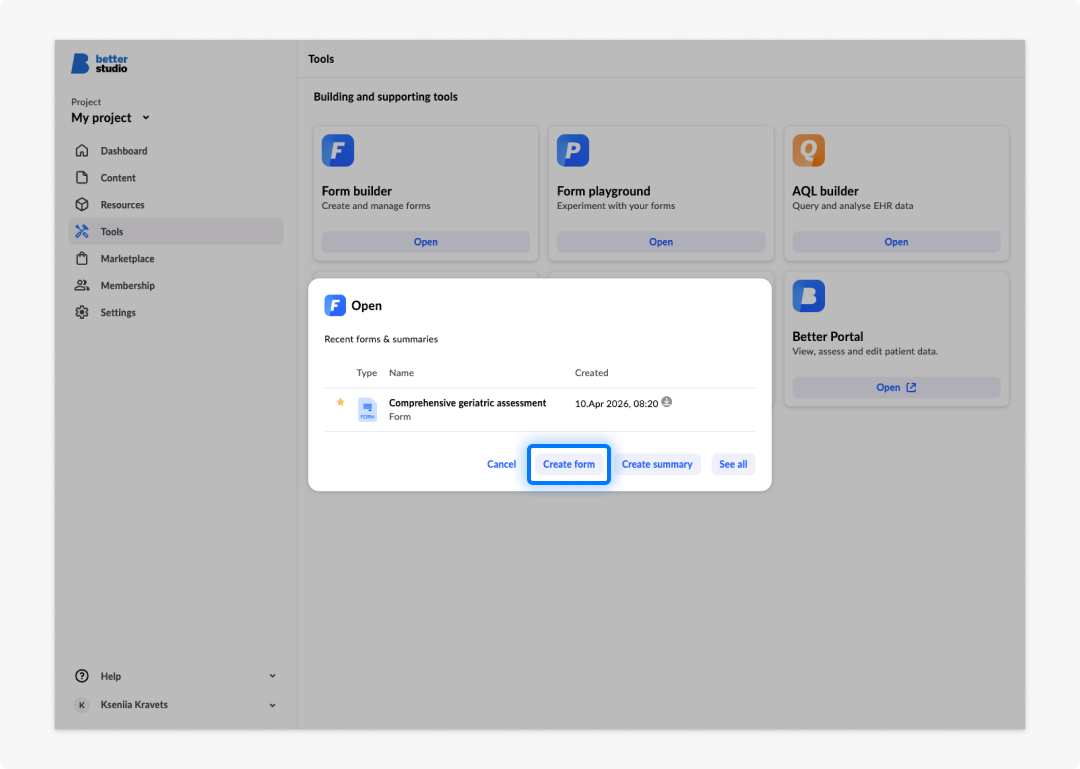
A pop-up window will appear. Choose Create form from the options available.
You can see other options here as well like Create summary and See all. If you click on See all the list of your existing forms and summaries will appear. You can open and edit any of them by clicking on Open on the right-hand side.
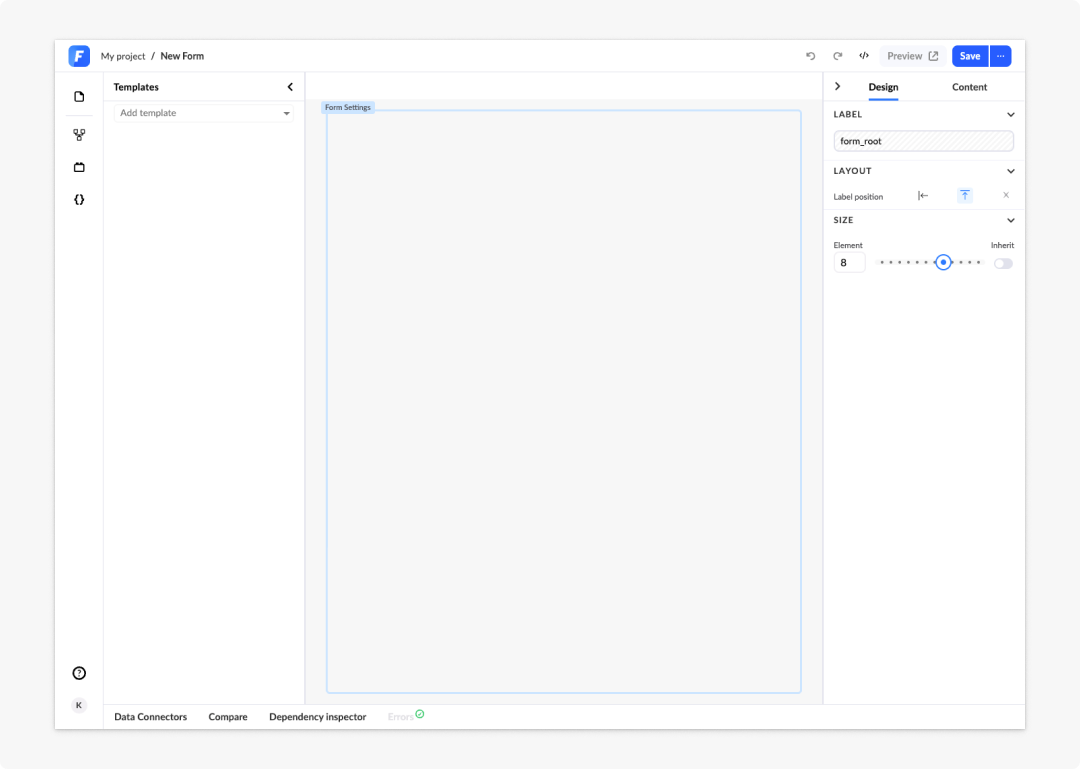
The Form Builder has three main areas:
- Select panel: Located on the left, here you can select the elements you will be using either from a template structure, from generics elements, or from variables. You also have the capacity to create multi-page forms.
- Canvas area: This is the central workspace where you design your form by dragging and dropping the various elements you will need.
- Design and Content panel: Located on the right, here is where you configure and design any selected field from the Canvas.
Step 3: Add your first form elements
You will now add components and template fields to the canvas using a simple Vital signs template.
In Form builder, fields added from a template are automatically linked to openEHR data structures. This means that when a user fills in and submits the form, the data is stored in a structured, interoperable format, without any manual configuration on your part.
To add your first template fields:
- In the left Select panel, click on the Templates icon.
- From the dropdown menu on the left select Basic vital signs or Vital signs. The template's fields will appear below.
- You will see a list of clinical data elements from the Vital signs template like Blood pressure, Body temperature, Body weight, Height/Length, and Body mass index.
- Drag and drop or double-click the Blood pressure component into the central canvas.
- Drag and drop or double-click the Body temperature component, placing it below the first field.
- Continue adding the remaining Vital signs fields (we will only need to add the Body weight, Height/Length, and Body mass index for now) the same way until you have the data points you need for this form.
You can rearrange fields on the canvas at any time by dragging them to a new position. You can also select any field and use the right panel to adjust its label, layout, or display settings.
Step 4: Save your form
Once you have added your Vital signs form components, click Save in the top toolbar.
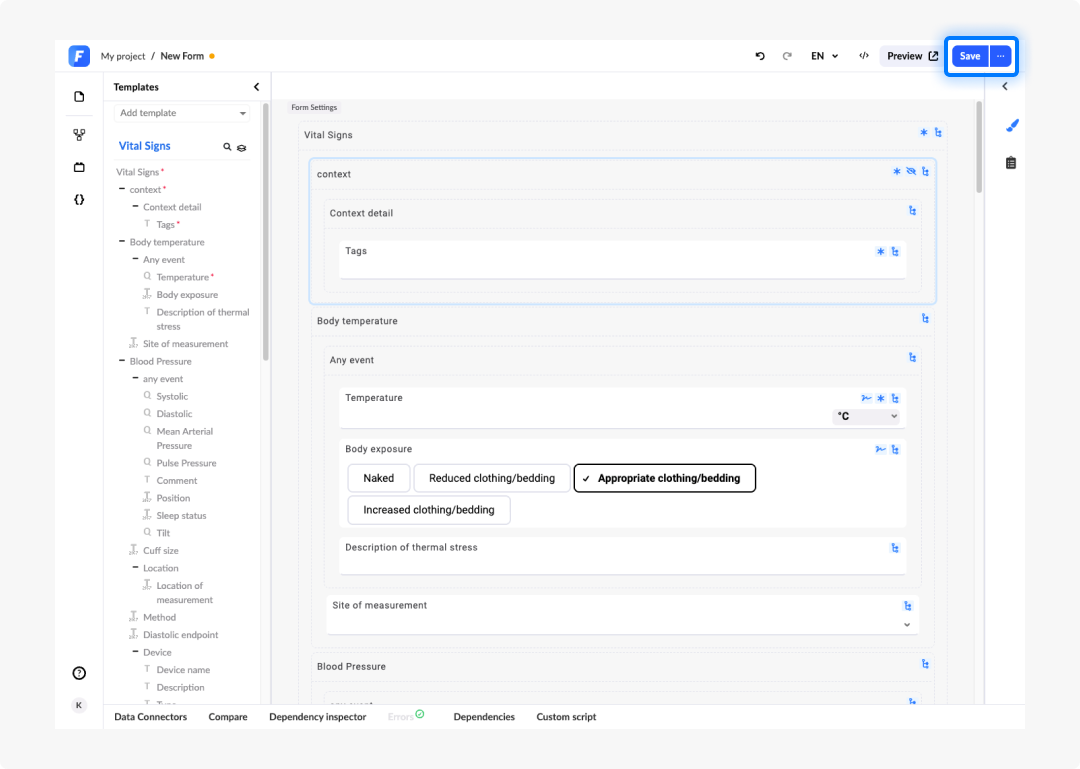
To save the form you will:
- Give it a name: You can call it "My Vital Signs"
- Check the version sequence: The structure of saved form versions is major.minor.patch, so you can save it as 1.0.0.
- Add a comment (optional): You can use comments to specify what you changed between versions. In this case, you can write "Created the form, added basic template elements".
- Add a label (optional): For organisational purposes, you can add labels to unify and organise your forms. You can create a label here, called "My forms".
Versioning forms: Whenever you go to save a form, Form builder will automatically change the patch version number for you, so to avoid overlap. You can manually change this if you wish.
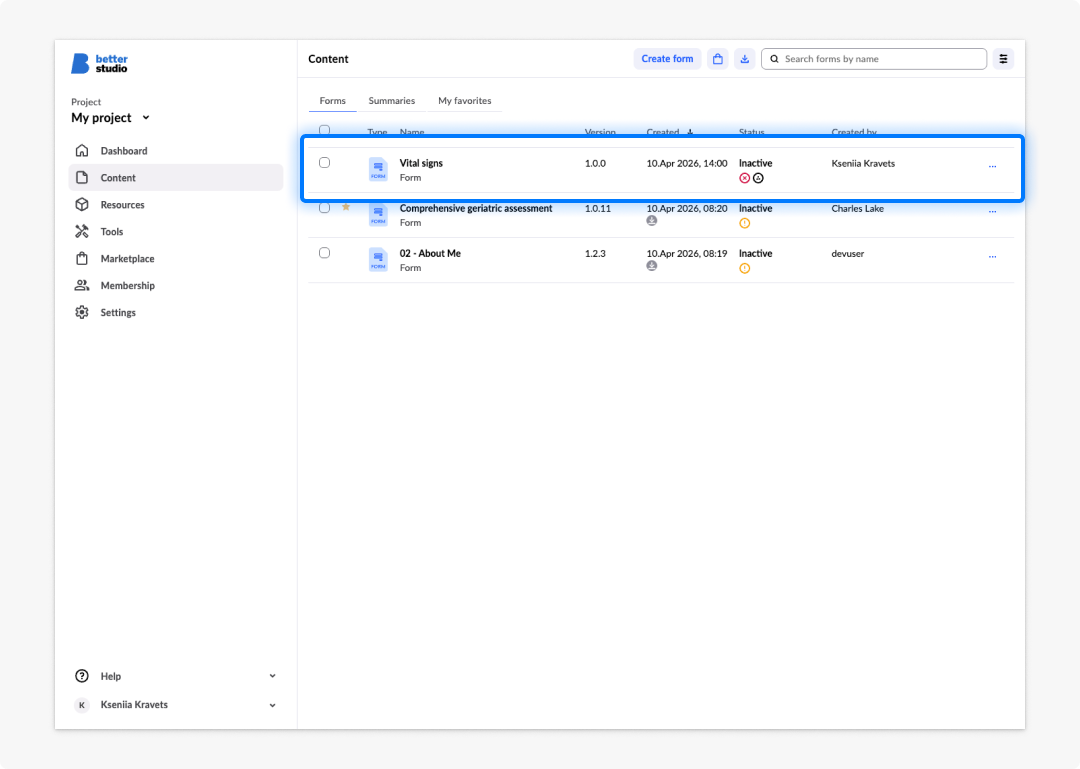
- Click Save. The form will be saved and now available in Form builder on the Content list.
Frequently asked questions (FAQs)
What are the three main areas of the Form builder interface?
The Select panel (left) is where you choose elements from templates, generic elements, or variables. The Canvas area (centre) is where you design your form by dragging and dropping elements. The Design and Content panel (right) is where you configure and design any selected field.
How are fields added from a template different from generic fields?
Fields added from a template are automatically linked to openEHR data structures. When a user fills in and submits the form, the data is stored in a structured, interoperable format without any manual configuration required.
Can I rearrange fields after I have added them to the canvas?
You can rearrange fields on the canvas at any time by dragging them to a new position. You can also select any field and use the right panel to adjust its label, layout, or display settings.
What information do I need to provide when saving a form?
You must give the form a name. Optionally, you can check or adjust the version number (using a major.minor.patch structure), add a comment describing what changed, and add a label for organisational purposes.
How does form versioning work in Form builder?
Form versions follow a major.minor.patch pattern. Example: 1.0.0. Each time you save a form, Form builder automatically increments the patch number to avoid overlap. You can manually change the version number if needed.